Welcome to Hevener.Com©
The Sirio Vector 4000 Review.
Welcome again to my attempt to add another, much needed review on another very fine 10 - 12 meter antenna.
The SIRIO Vector 4000.
My review of the Sirio SD-27 Dipole received such a large response that I decided to do another one. I was also curious to see if the quality of Sirio's dipole was a fluke or if it was part of the company's "Modus Operandi". So, I picked an antenna that seems to be rather popular among European operators.
As with my review of the SD-27, the first thing I noticed upon opening the box was how VERY well made the components were. Again, Sirio comes through in fine fashion by providing very high quality parts and again, Sirio comes through by providing everything you would need to put this antenna in the air with minimal frustration.
Everything was made from high quality aluminum, nylon and plastic. However, good quality material does not neccesarily mean that it is flawless. So far, the only downside to this antenna is it's structural design, I will elaborate more on this later on in the article. For now though, just know that the actual parts you will receive are not your typical "Let's see how cheap we can get with the materials and just throw an antenna on the market."
In my eyes at least, Sirio is shaping up to be one of the good ones.
When you receive the antenna, you will receive a well packed box of parts and a set of instructions that will have you up and running in a relatively short amount of time. However, this antenna is a bit more complicated than their dipole and is significantly more sophisticated, this one is not for the faint-of-heart or the "antenna-challenged" operator.
It will be very helpful for you to have at least a basic knowledge of hand-tools and antenna assembly experience. Also, as far as vertical omnidirectional antennas go, this antenna is extraordinarily large and a bit unwieldy, make sure you have lots of room and at least one extra set of hands when it comes time to erect this beast.
If your only experience with a base antenna is one of those fiberglass fishing poles, you will be in for a rude awakening when you finally get this one together.
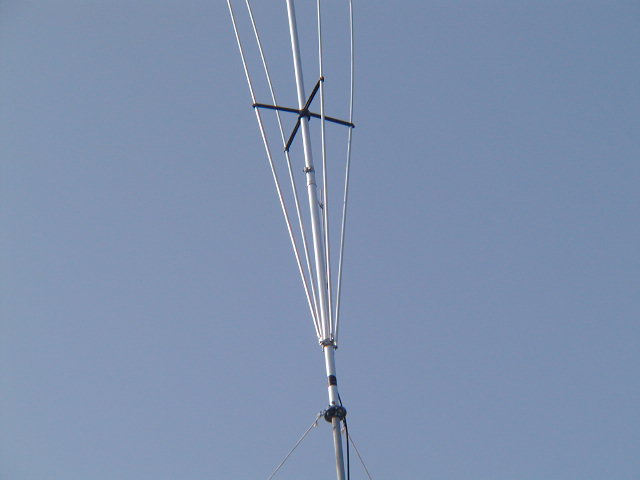
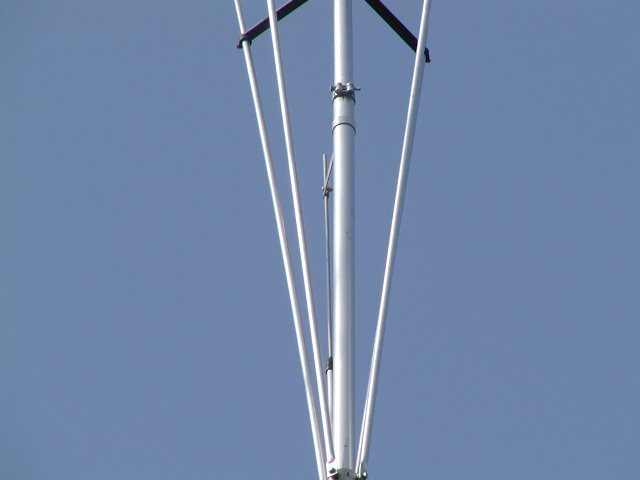
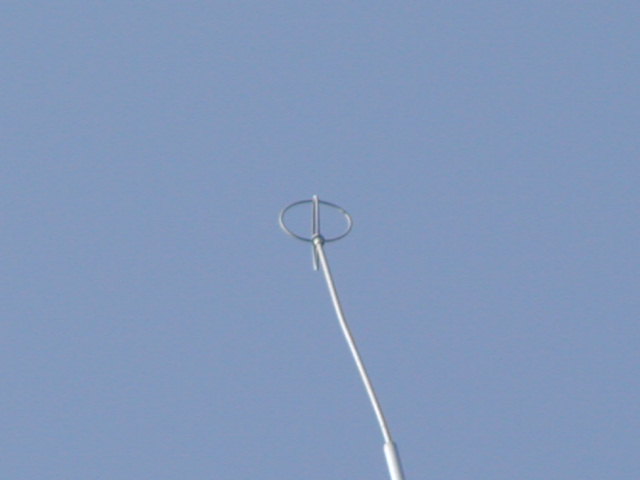
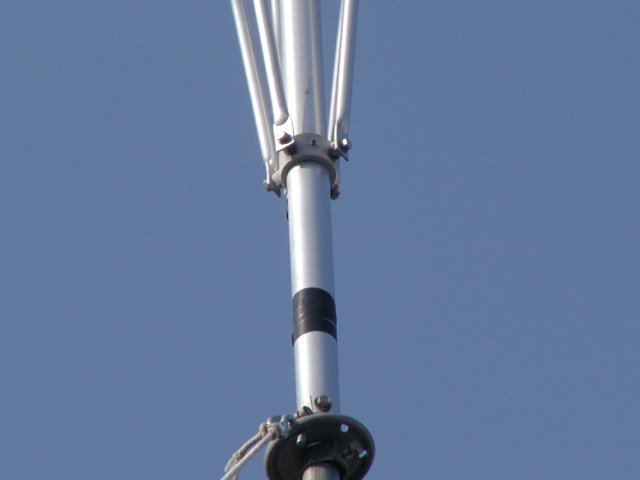
Assembly is made easier by Sirios design in materials. The main, center element is a set of aluminum tubes that are concentrically smaller as you go up and therefore simply slide into place from inside of itself and then locked into place via the provided self-tapping and allen screws. The very top portion is a solid aluminum rod with a folded, solid aluminum rod "top-hat" and can be used to do some fine adjustments to the SWR when completed.
However, if needed, the majority of the adjustments are easier made via the Gamma / Ground plane match system. This center element by the way, is where the structural design problem comes into play in my opinion. While the material is good quality, I feel it should have been made heavier. Because this element is so tall (3/4 wavelength at 11 meters!) it will bend very easily. My solution was to add concentrically smaller wooden dowls inside of the element as I
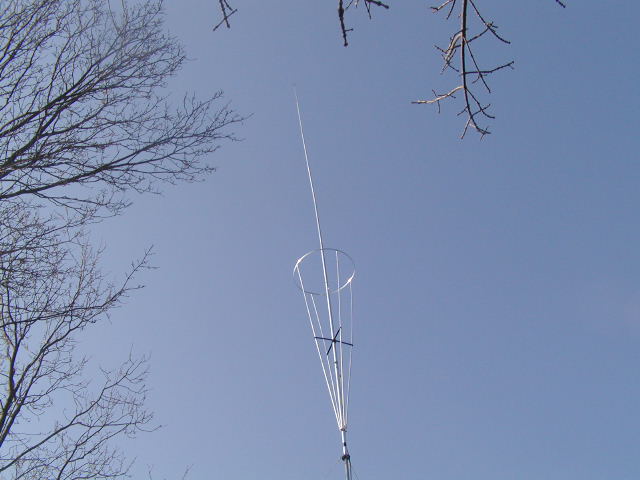
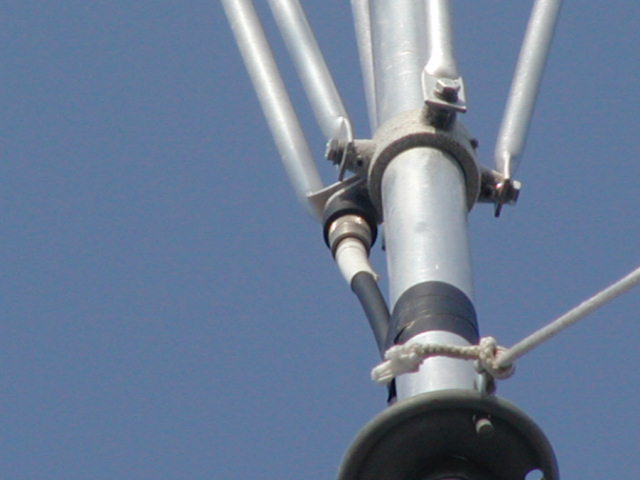
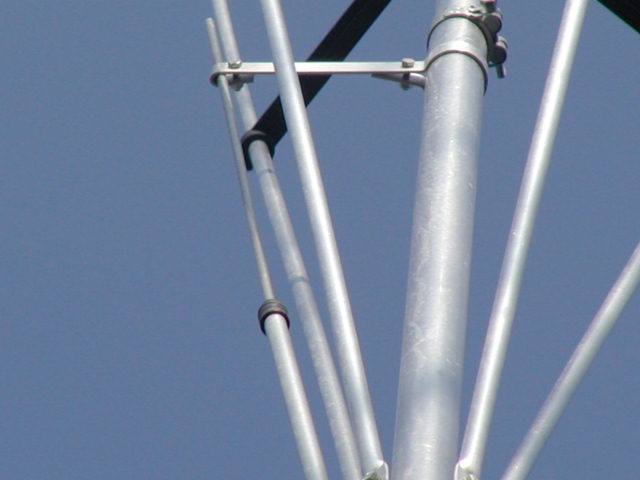
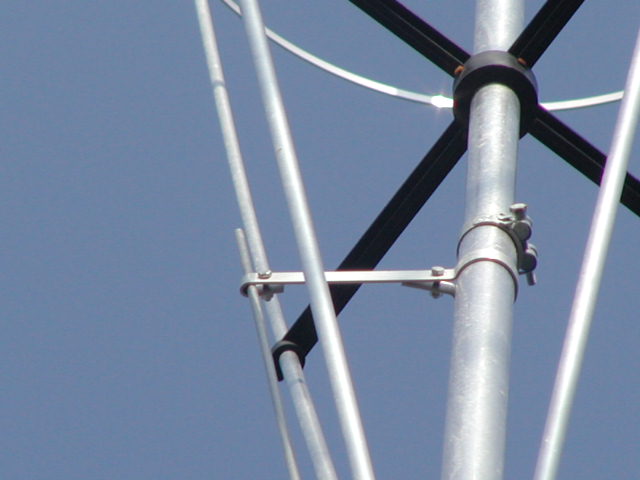
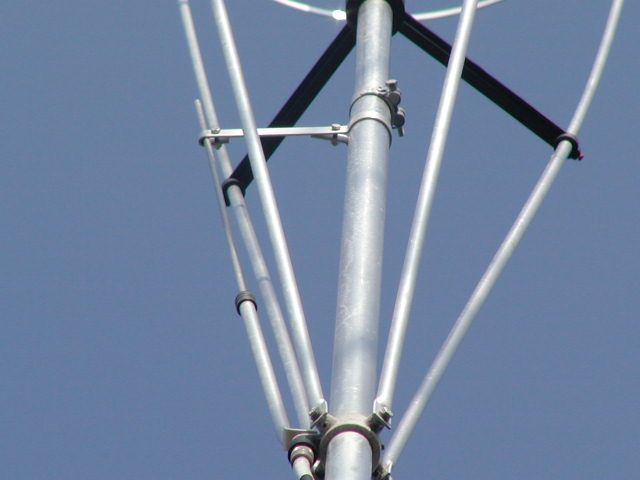
assembled it. As you will see in the pictures below, the element and antenna in general did in fact become slightly out of shape during a Nor'Easter storm that lasted 3 days with wind gusts of 65 mph plus. I probably could have made the antenna even more sturdy by adding some heavy monofilament supports around the "hooped groundplane". Also you will see the solid top-hat element is a bit bent as well, this was my fault completely as I had stepped on this while it was on the ground.
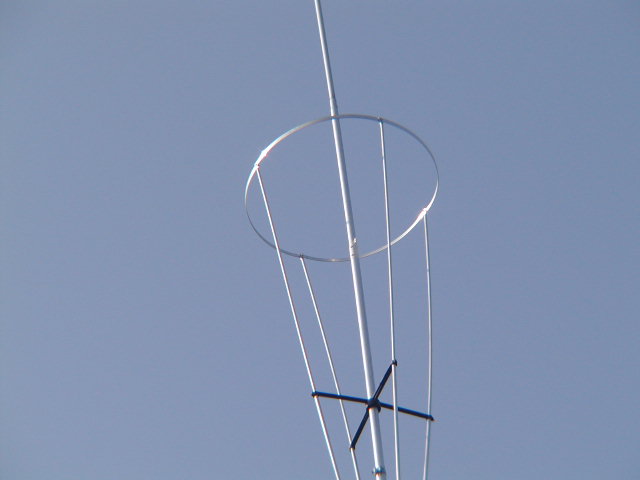
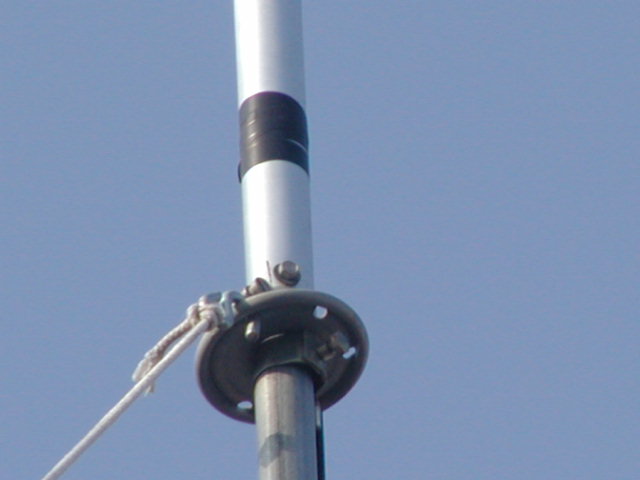
The ground plane system is assembled seperately and does take some patience. However, it is a fairly good design and provides not only a unique look to this antenna, but also provides the basis for it's superior performance. (More on the performance part later.) After the ground plane system is completed, the center element can then be attached to complete your assembly.
While I am at this point in my review, I will note here that this antenna has become somewhat of a controversial item. I will only explain in a nutshell what the controversy is about, but will let you uncover on your own, the details and finer points of it. The antenna is marketed (Or at least WAS at the time of this writing.) as a 3/4 wave antenna. However, the ground plane is 1/4 wave length tall and the center element is 1/2 wavelength tall ABOVE the top of the ground plane (Although the element itself is approximately 3/4 wave length tall in total.).
While I will try not to inject my personal opinions on this, I will only say that I am an antenna designer and builder and is what keeps me so interested in my HAM radio hobby. While this antenna is technically 3/4 wave lengths in size, the ground plane does in deed effect it's electrical properties. Electrically, it most certainly is NOT simply a 3/4 wave length antenna, but it too is most certainly NOT just a 1/2 wave length antenna either. The whole system together makes up an altogether radiating system and this is where
I will end my input on this matter. At least in so far as this article is concerned.
Now, onward and upward we go. After I assembled the antenna, I decided that I would be mounting this "ON" the mast and not simply "TO" the mast. So I grabbed a hacksaw and cut a several inch long slit in the bottom of the aluminum tube and slid it over the end of the 30 ft telescoping mast that I would be attaching it to (Yes, this is the same mast that I used with the SD-27 Dipole.)
I then drilled a hole through the antenna and mast together and put one bolt through the whole thing while also using a stainless steel hose clamp at the same time. The last thing I wanted was to see this thing laying on the ground because of a mounting system, so I decided to go this extra step although, simply using U-bolts to attach it to the side of the mast may very well be sufficient, it's up to you as the owner to decide how you want to mount it. I also decided that this time
I will be using guy ropes as this antenna does have some weight and a fair amount of wind load to it.
Now that everything is together and assembled and tuned as per the instructions, I again called a buddy of mine over to the house and up we went. This antenna is much more intimidating then a simple dipole as the whole system (Mast AND Antenna) is now approximately 61 feet long. But, we managed to finally get this thing up and into place on the side of the house and then lifted up into the mast mounting brackets which are installed at about 6 feet above ground level. The whole assembly now is approximately 67 feet to the top of the antenna, above ground level.
(Although I eventually climbed back onto the roof and slid the mast back inside of itself a total of about 5 feet to bring the overall height down a bit. Even with the guy ropes, this thing did some swaying!) I then ran the RG-213 coax back under the house again and up into the shack.
I cleaned up my mess in the yard, went back into the shack and hooked everything up. I run an Icom IC-706MKIIG as my only radio and utilize an LDG IT-100 auto-tuner for my HF antennas. Although, the tuning instructions on the Vector 4000 for 11 meters appeared to be right on the money as it tuned in at a beautiful 1.2:1 SWR in the center of 11 meters. The tuner is only used for 10 and 12 meters.
I also have a homebrew Windom OCF wire antenna for other HF bands...this may be yet another review later on, stay tuned. Also by the way, I run a Tram 1400 VHF MURS antenna for my 2 Meter chatting and a homebrew, 10 element UHF antenna for 70 Centimeter work. (Again, stay tuned and expect a review / datasheet soon on one of my finest antennas to date.). For tuning on VHF, I utilize an MFJ-921 Dual Band tuner
and I tie everything together with an MFJ-874 All band, all mode PEP reading SWR/Watt meter (Before the tuners) and then run everything through a couple of antenna switches.
This should give you an overall idea of what the shack looks like and an idea of just how many cables are sprouting about in there.
Upon turning the radio on, I was again impressed with how very, very quiet this antenna was in terms of static / white noise. Aluminum really is a far superior material for antenna use than a small wire running inside of a fiberglass shell when wanting to reduce your noise levels. I then scanned around the 11 meter (CB) band to see who I could drum up locally and dialed into a popular local channel. My receive was significantly and dramatically better than it had been previously. Having all of that metal in the air makes a big difference. Folks that I normally would find in the S3 area of my meter were now S5 or better. Folks that I
couldn't hear at all before, were now all over my radio! One of my closest friends, who lives about 15 miles from me, met me on a particular channel so that we could compare the difference in antennas. He was now several S units higher on my end and I too had jumped several S units on his end. This antenna is a talker! The radio puts out about 100 watts (Easily, but I won't go into details here...*snicker*.) but I decided to put an amplifier in-line to see how well this antenna would perform under "heat". I then moved up to 10 meters, where I could legally run 1500 watts and fired it up. The antenna easily handled the power and
didn't "drift" or waver one bit. The rated power handling of this antenna is well within what it can actually do. The tuner easily brings this antenna into tune anywhere I go also. The end results are, this is a very impressive antenna with performance that you will unlikely beat with ANY vertical, omni directional antenna.
If you have the room, I would absolutely recommend this antenna to anyone. It does take a little thinking on your part in order to make it a more sturdy antenna and it does take a bit of work to assemble and erect, but for the performance you will get out of it, it is worth every effort you put into it. It really is one of the best antenna's I have ever used, anywhere. Back in the old CB days, I used to talk on a Moonraker IV and I would dare to say that this antenna even outperforms that (Sans the rejection and directionality of course.). The low angle of radiation that this antenna provides is wonderful! It really makes quite a difference in DX talking.
With those fewer "hops", you will be talking DX like never before on a vertical omni. If you ever thought about getting a new antenna and don't want to swing a beam around
then this is the antenna for you!
Below are some pictures of the Sirio Vector 4000 antenna in the air. You will see some of the effects of the high winds on it, but hopefully you will also notice the quality of the parts and the beauty of this terrific antenna. (And, if you're wondering where you've seen this antenna before, it is indeed a near duplicate of the original Avanti Sigma IV but with some very minor modifications.) Now go out and get one!
This website is purely for entertainment purposes. Any and all articles, reviews, products, pictures, writings
or any other material published on this website are written and are to be used for entertainment purposely only.All materials on this website are
written and posted purely to entertain the reader/website visitor. All opinions, articles and written statements on this website are opinion.
Anyone visiting and viewing the material on this website agrees that the content on this website is to be used for entertainment purposes
only. This website does not condone or take part in illegal activites and can not be held responsible for any illegal acts committed by anyone
including visitors or any other persons who may read or see or hear about any content from this website. Since this websites content is purely for
entertainment and is purely for entertainment purposes we refer anyone seeking information regarding any electronic devices governed by the FCC
including CB radios to visit the website of the Federal Communications Commission. For factual information regarding Citizens Band radio rules and
operation please visit the FCC website at Their Website.
The FCC is a government factual source for legal rules and information on how to buy, use, and operate a CB radio.
|